Tuesday, December 31, 2013

What To Do With Your Bible?

A year ago, I posted a challenge to Read Through The Bible In A Year.  Are there any readers that did it? Did you take up the challenge and dig into the Word of God this year?

If not...its ok. Today is a new day, and tomorrow starts a brand new year. I always encourage folks to jump in and pick up anywhere in a Bible reading plan. We need the Word of God more than we need daily food. It is vital to our survival in this crazy world in which we live. The Word of God is the only absolute that never changes, and makes sense. It is where we get the reasons and principles for WHY we do what we do. If we don't have a Biblical basis, we will end up changing according to our surroundings.

Why is it so important to have a plan for reading our Bible? Because we can get easily distracted with all the noise of daily living and modern technology, and quickly fall into bad habits of neglecting the things that are most important to us, even if we mean well!
 
Following a plan will build character in your life. While character is not essential to becoming a born again child of God, (God already did all the work for that - all we have to do is believe it and accept His gift), having good character is definitely helpful to live a life that will be pleasing to our God. Having character strengthens us to resist temptation and strive to live right, even on the days we might not feel like it.
 
Here are two more sets of Daily Bible Reading Schedules that I recently came across. Both of them have been graciously allowed free distribution from the people who created them, so rather than making them available here, I am simply including a link to the sites where they can be found.
 
The 52 Week Bible Reading Plan breaks the Bible down into small daily readings. It is for those who might not want to read through the Bible from beginning to end, but would be more interested in skipping around and mixing things up a bit. In a week, you will read portions of Scripture from the Epistles, the Law, Poetry, Prophecy, History, Psalms, and the Gospels.
 
A traditional daily Bible reading plan that starts in Genesis and ends in Revelation. It is written by weeks, not dates, so you can jump in anywhere and at any time.
 
Here is a link to a page of interesting and unique Bible reading plans that will allow you to choose any number of ways and time frames to read through and study your Bible.
 
What can we do with our Bible? Here is a list,  A-Z. I challenge you to make this list a part of your everyday life, and embrace and cherish the Word of God this year like never before!
 
Jeremiah 26:2, "Diminish not a WORD."
 
  • We need to accept God's Word;
  • We need to believe God’s Word;
  • We need to cherish God’s Word;
  • We need to depend on God’s Word;
  • We need to enjoy God’s Word;
  • We need to feed on God’s Word;
  • We need to grasp God’s Word;
  • We need to hear God’s Word;
  • We need to include God’s Word in our life;
  • We need to join with God’s Word;
  • We need to keep God’s Word;
  • We need to love God’s Word;
  • We need to memorize the Word of God;
  • We need to need God’s Word;
  • We need to obey God’ Word;
  • We need to preach God’s Word;
  • We need to quote God’s Word; 
  • We need to read God’s Word;
  • We need to study God’s Word;
  • We need to treasure God’s Word;
  • We need to understand God’s Word;
  • We need to value God’s Word;
  • We need to want God’s Word;
  • We need to examine God’s Word;
  • We need to yearn for God’s Word;  
  • We need to zip to God’s Word daily.


Copyright 2012-2013 - "Be The One" - www.aclassofone.blogspot.com  All rights are reserved. No text, photos, or content may be reproduced without direct permission from the author.

Monday, December 30, 2013

Top Ten Christmas Gifts of 2013

I hope all my blog readers had a wonderful Christmas. I know our family did.

We were able to give and receive some very enjoyable gifts this year, and I decided to make a "top ten" list to share here on the blog. I don't know about you, but I am one of those people who shops for small items randomly year round, to spread out the expense of gift giving and make it budget friendly. Here are some ideas of really fun gifts that might be an inspiration to you for your own family or friends.

1) Family Movie: "Come What May"  This movie has been on my oldest's 'wish list' for quite a while now, and she was very happy to finally be able to see it. You know it's a successful choice of a movie when your teens want to watch it a second time the next day! A really neat side note: this movie stars over 40 homeschoolers in it! I plan on writing more about the movie at a later date, perhaps in a "family movie night" post.

2) Another family movie: "Sheffey" This is a great movie - an old family favorite that we have seen enough times to wear out our vhs copy....so we upgraded to the newer DVD version!

3) Really fun and interesting game: "Suspend"

This game uses varied length metal rods with different sets of notches, and has a beginner, intermediate and advanced level to build a tower that will not topple over. It sets up quickly, and is easy and fun to play. It is also different every game. A complete game takes no more than 10 minutes and is a great way to sneak in some educational thinking (physics anyone??) while the kids are having fun.


4) Another really fun game:

Our regular version of "Battleship" has seen it's fair share of battles, so we branched out and got "Electronic Battleship" for the girls. Running on batteries, it comes complete with lights and sounds, and also sneaks in some learning moments, where the players have to 'program' in the coordinates of their ships, as well as learn some military lingo. (Alpha, Bravo, Charlie, Delta....etc.) The funniest moment was when dad and Kelly played and both selected the exact same pre-formatted ship configuration! This game would also work well for an only child, because they could play against the computer.


5) Snacks from Pretzel Perfection.  If you or someone you know is on a restricted, gluten-free diet, but enjoys gourmet snacks....then THIS is the website for you! Even though I felt the items were  a bit pricey, I did order a few of them to give away as gifts. WOW! Can I just say that these products are totally amazing and definitely lived up to the hype surrounding them! (Highly recommended: the salted caramel dark chocolate pretzels)

6) After reviewing the Lily Lapp series from Baker Publishing Group this year, we have been anxiously awaiting the 4th book in the series. I purchased this for Melissa and Kelly, and they were thrilled!


7) The girls are huge "Team USA" fans already, but with the winter Olympics coming up soon, they have been talking about it a lot more than usual. They loved receiving "Team USA" mittens! They are very warm and well made. (Made in the USA too!)


8 & 9) The Adventures in Odyssey series are well loved here. I like that I can have a source of entertainment that the girls can listen to, and I can trust it to be family friendly and not compromise our values.  They enjoy going online and listening to the audio adventures so much that I decided to purchase a few sets for them to have on hand. They have listened to them non-stop since opening them up! I guess that means they really like them!!! ;-)

The two we added to our collection are: Novacom (which comes in a very cool vault box) and the Bible Eyewitness, Hall of Faith Series which gives 'first hand' accounts of exciting Bible heroes. The stories are fascinating, and the entire family enjoys listening to them.

10) New music CD's.... "Be Our God" sung by Matt & Christy Taylor from Majesty Music.  Very nice!!


Copyright 2012-2013 - "Be The One" - www.aclassofone.blogspot.com  All rights are reserved. No text, photos, or content may be reproduced without direct permission from the author.

Monday, December 23, 2013

Special Coupon Code for Homeschool Spanish Academy

This past summer we had the privilege to use and review Homeschool Spanish Academy and it ended up being one of our favorite review items of the year!

Laura is looking to continue using this program this Spring, especially now that we have high speed internet to make things easier!

I was waiting for 'tax return' season in order to purchase another semester of the program, but with this special offer that the company is running, I just might be able to get it a little sooner for Laura.

Since this is such a great program, I wanted to share the coupon code for anyone who might be considering trying it out. I can guarantee that you will NOT be disappointed with Homeschool Spanish Academy!

Here's the scoop:

Go to the Homeschool Spanish Academy website.

Sign up and register for a Spanish course - there are various choices on class frequency and length.

When checking out, enter the code TISTHESEASON into the coupon code box. You will then receive 10% off your purchase price. This is good for ALL the programs that are available! There is no minimum purchase.

The offer begins today, and runs through 11:59 pm on December 31.

Enjoy your new Spanish classes!

Thursday, December 19, 2013

Christmas Pretzels {with an Allergy Free Alternative}

Every year our family does a ton of baking. We give most of it away as Christmas gifts. It's a lot of fun, and the girls look forward to our "baking day".

This year I found a really cute recipe for these pretzel snacks, and thought they would make a cute addition to our cookie trays. A bonus is that I figured an easy way to make them allergy friendly.

I got the original idea from this blog post and then made my allergy friendly adjustments, as noted below.

Here's step-by-step directions for making these:


First step is to gather supplies:
  • Ring pretzels
  • Hershey's candy cane kisses
  • Nestle red & green morsels

Cover a large baking sheet with wax paper or parchment paper, then spread the ring pretzels out over it so they are flat and not overlapping.

After unwrapping all the kisses, place one kiss inside each pretzel ring. Some of them might seem like they won't fit, and that's ok. They will melt and easily fill the area inside the ring.


Pre-heat your oven to 200 degrees. Place the baking sheet of pretzels and kisses in the oven for 4 minutes. After removing them from the oven, immediately place one small Nestle morsel into the center of each melted kiss. I used the smallest amount of pressure to push down and make sure the melted kiss filled the area inside the pretzel ring, taking care to not 'smudge' the red and white lines.

Place in a cold spot, to let them harden and chill. Enjoy!


They have a crunchy texture and a minty taste and look fabulous as fillers on a cookie tray. And the best part? This is a very kid-friendly project!

Now....for the allergy-free version......

I gathered the following supplies:

  • Ener-G gluten free, dairy free pretzel rings
  • Enjoy Life mini chocolate chips (gluten/dairy free)
  • crushed peppermints (you can take safe candy canes and throw them into a food processor - they will make a nice bowl full of crushed peppermint pieces)

Follow the same procedure as above - cover a baking sheet with wax or parchment paper, lay out the pretzel rings on the sheet, and fill each ring with as many mini chips as will fit without overflowing.
Feel free to pile them up, because they will flatten out when they melt.


Preheat your oven to 400 degrees and place the sheet into the oven for 4 minutes. When you pull the sheet out, immediately take a small spoon and spread the melted chocolate inside the pretzel ring area.


Quickly, before the chocolate hardens, sprinkle the crushed peppermint pieces into the  middle of each pool of melted chocolate.


These are crunchy, minty safe snacks for kiddos with allergies who can't enjoy all the regular Christmas baking.  The snacks are free of dairy and gluten and nuts!  And they are super easy and quick to make!

I am linking this recipe up with Lisa at Try A New Recipe Tuesday and Karen at Kids and A Mom In the Kitchen

Photobucket

This is also linked to Cooking With Kids at The Old Schoolhouse.

Cooking with Kids


Copyright 2012-2013 - "Be The One" - www.aclassofone.blogspot.com  All rights are reserved. No text, photos, or content may be reproduced without direct permission from the author.

Friday, December 13, 2013

Apologia Anatomy & Physiology Unit Three: Build A Model Robotic Hand


As we continue our journey through Apologia Anatomy & Physiology, I have found lots of cool projects to keep us busy and to reinforce the lessons we are learning.


STEM Resources for Homeschool


From my review of Supercharged Science in Spring of 2013, I remembered seeing a lesson with this project, and thought it would align perfectly with the unit that was studying all the muscles and tendons.

From this project, we learned that hands function because of the way the tendons are aligned. We found the tendon in our wrist that, when pressed, causes the fingers to twitch and curl. It is pretty amazing to study the handiwork of God and realize all that a hand is capable of performing.

We went to the Supercharged Science website and watched the lesson on how to build the robotic hand:


Then we gathered our supplies:

Supplies include:
  • cardboard
  • scissors
  • utility knife
  • bendable straws
  • string or yarn
  • thick rubber bands
  • hot glue gun and glue sticks
  • pencil
We traced an adult sized hand on cardboard and carefully cut it out:


We glued the bendable straws on each finger, so that the bendy part was on the hand and the long part of the straw was on the fingers. We trimmed the edges of the straw to align with the edge of the fingers.


We took our pencil and marked on the fingers of the cardboard hand the location of the joints and knuckles from the real-life hand.  Then we took the utility knife and carefully scored the back side of the hand on those lines, so that the fingers would curl and bend properly.


Using our pencil marks as a guide, we carefully sliced a section of the straw off (at 45 degree angles) where the joints are located. This helps the 'fingers' to bend properly as well.


When we are done with all the joint cuts, it looks like this:


We took string and ran it through each straw, leaving a long tail out both the top and bottom of the straw. We cut the rubber bands so that they would be a long strip instead of a circle. At the top of each finger, we tied the string and rubber band ends together in a small knot.


Turning the hand over, and with fingers straightened out and laid flat, we hot glued the loose ends of the rubber band down to the back of the hand. The glue should only be right at the end of the rubber band. The rest of it needs to stay loose so that it can freely move and guide the fingers. The rubber bands help the fingers to return to their natural state after being curled up. 


Once the hand was completed, we had lots of opportunity to 'play' with it and see how the tendons in a hand function, by pulling downward on the strings.


One of the favorite things to do with the hand was to make sign language letters and spell out words and phrases....or to say "I love you"!


This was a great project and we were very happy with the outcome. Everyone who has seen it is fascinated by it, and it clearly demonstrates the movements of a hand. I highly recommend this project!


Copyright 2012-2013 - "Be The One" - www.aclassofone.blogspot.com  All rights are reserved. No text, photos, or content may be reproduced without direct permission from the author.

This post is linked with Apologia's Homeschool Science Share & Tell

Monday, December 9, 2013

Building a Salt Dough Map of the Oregon Trail

As part of our study on the American Westward Expansion of the 19th century, we have read several books and materials about the Oregon Trail.

In order to illustrate just how huge of an undertaking it was to set out for the West on wagon trains, and to cross over the Rocky Mountains in the process, we decided to construct a Salt Dough Map of the United States, illustrating the location of the Oregon Trail and showing how it crossed over the mountains.

Melissa was amazed at just how far a trip it was, once she figured out the scale of her model in miles! No wonder it took months to get to the West Coast!


Here is a picture of the finished project:


And here is a close up of her mountain ranges, with the tan line illustrating the Oregon Trail crossing right through the mountain pass.


While our Oregon Trail was a little 'south' of it's proper location, it still was able to drive home two very important facts: 1) It was a long trip that covered a large portion of the United States, and 2) Crossing the western mountain ranges was no small feat!


Would you like to make a salt dough map? It's very easy!

First, obtain a piece of flat cardboard, and sketch your outline onto it. For our map, we traced an outline of the US from a map in a book, then cut it out, making a template and tracing it onto the cardboard.

Next we mixed up the dough using the following recipe:

2 cups salt
1 cup white flour
about half cup of water

We thoroughly mixed the salt and flour, and gradually added the water a few drops at a time until the dough was moist and flexible, but not watery.  We started out with a half cup of water, but did not even end up using all of it.

We left ours white, then painted it once it was spread out and dried, but another option is to separate the dough into as many colors as you will be using for your project, then mix food coloring in to each dough portion to make 'colored' salt dough.

Once you have your dough prepared, spread it out onto the cardboard outline, taking care to keep the dough from spreading outside the lines. While it is still moist, create the geographical landforms of your map. For our project, Melissa first pinched the dough into mountains both out west and also in the East, to represent the Appalachian Mountains. She also made craters for major lakes, and took the back of a spoon to make straight lines for major rivers, and for the Oregon Trail itself. Although it didn't show up well, she made an X to mark the spot for the start of the Trail in Independence, Missouri.

The salt dough takes about a full 24 hours to dry. Once it is dry, it can then be painted if desired. Melissa painted our mountains brown, prairies green, rivers and lakes blue, and finally she painted the Oregon Trail tan so it would stand out. As an artistic final touch, she flecked some purple hues onto the highest mountains to show "Purple Mountain Majesties".

The project looks really neat when completed. It's a great project because it is a wonderful, hands-on learning tool that doesn't take long to make, and doesn't leave much mess to clean up. This salt dough recipe is really not messy at all! And when it is complete, you can pretend that you are looking at the US from outer space. (That brought a whole different angle to this lesson!)


Copyright 2012-2013 - "Be The One" - www.aclassofone.blogspot.com  All rights are reserved. No text, photos, or content may be reproduced without direct permission from the author.

Apologia Anatomy & Physiology: Systems Review Game

As we continue on our journey of working through the various human body systems, I came across a recommendation for a website that has a free, interactive review system to help challenge students to memorize all the parts that make up our anatomy.

Anatomy Arcade has been providing lots of fun and challenging review, with games like "Poke-A-Muscle" and "Whack-A-Bone". Students compete against their own times, and cannot unlock new levels until lower levels have been mastered. Although we have not played every game on the website yet, all we have played so far have been very tastefully done and family friendly for children's eyes.

Although I don't own an iPad, the site touts iPad apps for many of their games as well, and best of all....did I mention they are free?

High scores are rewarded by allowing the student to record their initials on a high score board. Once you get started on a game, it is really hard to stop until you have reached mastery! So be prepared to set aside a little time for exploring the website and enjoying all it has to offer!

Graphic taken from the Anatomy Arcade website.


I think this game is a great help to anyone who is studying Anatomy & Physiology, and I am so glad we have been able to make it a part of our studies!


Wednesday, December 4, 2013

Apologia Anatomy & Physiology Unit Four: Digestive System Video

This is a tremendous, simple video complete with live camera action of food actually going through the digestive process. Very interesting!

Special Offer from YWAM

Back in October, I had the privilege to review a biography from YWAM - the story of Jim Elliot.  We really enjoyed this book, and it has been on my "wish list" to order more books from YWAM ever since! It is always good to have trusted books on hand that the kids can pick up and read, and be inspired by.

YWAM put together a fabulous sale for Cyber Monday, and they have extended it for this entire week. I wanted to share it here, in case anyone is still looking for some Christmas gift ideas for the young people in their life!

Included in this gift package is a gift boxed set of 5 books from the "Christian Heroes Then and Now" series, a gift boxed set of all 5 books from the "Heroes of History for Young Readers" set, and an audiobook.

The regular cost of all these items would be about $112 but with this special the cost is only $45 with free shipping. You must use the code CYBER13 during checkout.

This is a tremendous opportunity to add to your family's homeschool library.

To go to the sale page, click here: YWAM Cyber Monday Sale

The sale price is good until next Monday, December 9, 2013.

Wednesday, November 20, 2013

The Old Schoolhouse Review Crew: Year End Roundup

It was such a blessing (not to mention a lot of fun!) to be on The Old Schoolhouse Review Crew this year! I am very thankful for the opportunity. This year, I have learned so many different things, not only about homeschooling, but about blogging, writing, graphic design, and day to day aspects of homeschooling that I never even thought about before! I have been a part of a community of amazing homeschool parents, and shared in their joys, triumphs, and burdens of homeschooling and raising children.

This past year, I have had the privilege of reviewing 41 different items in our home!  Some were 'fun' and others were hard work. Many of these items were brand new to me - I had never even heard of them before! Others were ones that I knew 'something' about, but was glad to investigate them 'in depth'.

First of all, the entire Crew voted on their favorites for the 2013 Blue Ribbon Awards.  The kids helped me vote, picking all their favorites. As expected, many of our favorites were also favorites of the other families, and won the most votes for their category. The kids were pretty excited to see what won, and also to share which review items were their favorites for the year!


I would like to share our family's personal "Top Ten Review Items" for 2013:

1) All Around Favorite, most awe-inspiring product: Homeschool Spanish Academy  Laura had been saving up her own personal money to purchase a semester of this program. When it became available for review, we were ecstatic. She really, really loved it and I loved the fact that she was enjoying her Spanish so much! Her teacher was so sweet, and it was absolutely amazing to be conversing in Spanish with a lady in Guatemala while sitting in the comforts of our own home! Laura voted this program as her most favorite review item of the year!

2) The program that made Mom really happy: ok....where do I go from here? There were several....but I have to say that High School Prep Genius is a pretty amazing book. Amazing enough that I purchased several copies and have given/lent them to other high school homeschoolers. Homeschooling high school is definitely not for the faint of heart, and I really felt like this book thoroughly equips a parent for the journey.

3) The program that Mom had the most fun with:  Again, hard choice. But I will settle on Picaboo Yearbooks for this one, since it seemed like all fun and no work to put it together. It came at a very convenient time. When we started the review, Heather had just graduated, so I took the opportunity to make her a special graduation keepsake album of her Senior Year, which she treasures.

4) Family fun:  The Presidential Game brought us many happy 'family game night' memories.

5) Kelly's favorite:  Hands down....Kelly loved the Lily Lapp Books from Baker Publishing. Actually her and Melissa both loved these books....enough that I have purchased the rest of the series! They go on the website and do the activities for the books, they have used them for book reports, and they have shared them with their friends. I love the clean living and wholesome stories that are presented.

6) Melissa's favorite: While we had an abundance of Spanish curriculum reviews this year, which was great for Laura and Kelly, Melissa has always wanted to learn French! There are not as much materials and resources available for learning French as there is for Spanish, so this had been placed on the back burner for awhile, or at least till Melissa is older. We were so pleased to be on the review for French Essentials! Learning French has been a lot harder than Melissa thought it would be, but she is so thrilled about it, and voted it as her favorite!

7) Best Overall Addition to our Homeschool: We have dabbled with Apologia Science in the past, but this year, we jumped in full time! While we are currently studying Anatomy & Physiology, we had the blessed privilege to review the brand new Exploring Creation with Chemistry & Physics curriculum and were very pleased! Melissa thrives on the hands on approach to Science, and has been learning and retaining so much information. When we complete our current Anatomy study, we are going to change gears and finish what we started in the Chemistry program.

8) Wow..."I Can't Believe I Made This" Award: This definitely goes to Rosie's Doll Clothes Patterns. Melissa is learning how to sew, and this couldn't have come at a more perfect time. By watching the online videos, and following the pattern and directions, she was able to create an outfit for her American Girl doll all on her own without my help! Such a confidence booster for her! It was so exciting to watch her grow so much in this area with just the help of this one program.

9) Dabbling In the World of Lapbooks: Until this school year, we had not made a lapbook before. I had heard about them, but really didn't even know what they were! This year we had the privilege to review several lapbooks from several different companies, and found out that Kelly and Melissa really enjoy building them! I think the one from Homeschool In The Woods really impressed me the most.

10) Too Cool For Words: Rounding out our 'top ten' list is Adventus MusIQ. This is a really unique program that gives interactive piano instruction through the computer. While we have not used it as much as I would like, it is always enjoyable when we do get to use it. The girls have a keyboard that hooks right up to the computer and then they are able to receive instant feedback on their music practice.


Thank you so much to my Review Crew friends and leaders who have made my first year really enjoyable! Looking forward to another 'Tour of Duty' in 2014!

Tuesday, November 19, 2013

Apologia Anatomy & Physiology Unit Two: Build A Spine


As we continue on the study of the Skeletal System, we discussed the spine and how absolutely perfect it is for our bodies!

Not only is it our 'backbone' and main support of our body, but it is also the conduit for our Central Nervous System. The most amazing attribute of the spine is it's flexibility. Can you imagine how hard life would be if we could not bend?

We built a model spine to demonstrate the combination of vertebrae and discs, showing how each vertebrae has a cushion and shock absorber. This combination of bone and tissue is able to bend as we move our bodies.

The girls found this pretty fascinating!

How to build your own model spine:


This is a pretty simple, quick, and easy project! For supplies, all you need is wagon wheel pasta for the vertebrae, gummy Lifesavers for the discs, and a pipe cleaner to hold it together. (We also discussed how the bundle of nerves passes through the center of the vertebrae and discs, much like the pipe cleaner runs through the middle of the pasta and gummies).

Build your 'spine' by placing gummies and pasta alternately on the pipe cleaner. Bend the ends of the pipe cleaner to keep it all in place.

Demonstrate how a spine can be straight when we are standing, but also how it can be flexible when we bend over.

The best part about this experiment? The kids love eating all the gummies once they are done!

Copyright 2012-2013 - "Be The One" - www.aclassofone.blogspot.com  All rights are reserved. No text, photos, or content may be reproduced without direct permission from the author.

Monday, November 18, 2013

Apologia Anatomy & Physiology: Unit Two - Skeletal System As Helper & Protector

Apologia Anatomy & Physiology: Unit Two

How our Skeletal System helps protect us and support us!

As we continued through our study of the skeletal system, we completed two very simple projects that really illustrated some important jobs of our skeleton and bones!

First, we studied how the brain is protected by our skull! The skull is so interesting. An infant's skull is made to 'grow with them' and then fuse together when the head has completed it's growth. Inside the skull, our brain is surrounded by fluid, which allows it to be 'cushioned' and not get scrambled when we move around.

We illustrated this by taking an egg (the brain) and putting it inside a plastic container that was just a little bit bigger (the skull).


We then filled the container with water, put the lid on, and Melissa ran around the house with it, up and down stairs, and jumping all around. The egg was kept safe and perfect! It didn't suffer a scratch! (And as far as we know, it wasn't scrambled either!)  The egg 'floating' in water inside a container illustrates how the fluid inside our skull protects the brain.
 
We then drained the water out of the container, leaving the egg inside, and in a very vulnerable position. Melissa repeated all her previous movements, and then checked on the egg.....


Uh Oh!!! Scrambled egg with shells! Without the fluid to cushion it, the egg shattered. It is amazing how God designed us perfectly, allowing our body the ability to protect itself from harm.

We then explored just how important our bones are to our body by making a 'man' out of clay. The first attempt was 'just clay', and Melissa was disappointed that she could not seem to make a man that would be able to stand on his own.


After discussing how the main purpose of our skeleton is to support our frame, and give structure to our body, she then used toothpicks as bones and inserted them into our clay man. With this extra support, I am happy to say that he was actually able to stand up all on his own! (although he was a little top heavy!)

 
Don't you love his little toothpick smile?  :-)

Healthy bones play a vital role in our overall well being. It's been fun and interesting to learn about them.

Copyright 2012-2013 - "Be The One" - www.aclassofone.blogspot.com  All rights are reserved. No text, photos, or content may be reproduced without direct permission from the author.

Wednesday, November 13, 2013

Fall Flavors: Gluten Free & Dairy Free Pumpkin Muffins

Image from flickr.com - photo sharing, by Robert S. Donovan
 
If you love fall like I do, then you probably also love the flavors of fall....the layers of flavor available from various types of winter squash, apples, and grapes.
 
Here is a recipe that uses pumpkin to make a flavorful fall muffin that goes great with a mug of warm apple cider!
 
Best of all....it's gluten and dairy free!
 
Tip: If you would prefer to use fresh pumpkins as opposed to canned, you can easily do so. All you have to do is cut a pumpkin in half, scoop out the seeds, and place it with the inside part down in a large roasting pan. Pour enough water in the pan to cover the bottom, then put the pan in the oven at 350 degrees. Cooking time will vary according to the size of your pumpkin, but typically you can plan on at least an hour. Larger pumpkins will take longer, of course. The pumpkin is done cooking when the surface starts to brown and the inside flesh is very soft. Remove the pan from the oven and allow it to cool. Then scrape the pumpkin flesh out of the rind, and run it in small amounts through a food processor until smooth. This pumpkin flesh can then be frozen for later use, or used in any recipe that calls for canned pumpkin.
 
Pumpkin Muffins - DF & GF recipe
 
1 cup pumpkin puree (see instructions above or use canned pumpkin)
1/3 c. canola oil
2 eggs
1 1/2 c. gluten free flour blend
1 tsp. baking powder
3/4 tsp. xantham gum
1/2 tsp. baking soda
1/2 tsp. salt
1 1/2 c. sugar
3/4 tsp. cinnamon
1/8 tsp. nutmeg
1/4 tsp. ground cloves
1/8 tsp. ground ginger
(or if you prefer...you can substitute 1 1/2 tsp. pumpkin pie spice for the above 4 spices)
 
First blend your dry ingredients together in a large bowl. Make a space in the middle of the dry mix to pour the wet ingredients into. In a separate bowl, blend the pumpkin, eggs, and oil until well combined, then pour into the middle of the dry ingredients. Gently stir until just blended, but do not overmix or your muffins will turn out with a chewy, tough texture.
 
Prepare your muffin pans by either greasing them or lining them with paper liners. Fill 2/3 full with muffin mix and bake in a 350 degree oven for about 20 minutes. Muffins are done when a cake tester poked into the middle comes out clean.
 
Enjoy! These are especially delicious when still warm. :-)


Copyright 2012-2013 - "Be The One" - www.aclassofone.blogspot.com  All rights are reserved. No text, photos, or content may be reproduced without direct permission from the author.

This recipe is linked with "Try A New Recipe Tuesday" at Home to 4 Kiddos

Monday, November 11, 2013

Review: French Essentials

French Essentials LOGO photo frenchessentiallogo_zps55e20538.jpg

Nearly all the foreign language studies in our household, especially this past year, have revolved around various forms of Spanish curriculum. While that has been wonderful, one of my children has always had a strong desire to learn French instead!  Until this point, we had not explored this further as we simply had not come across a suitable and affordable program for her to use. Then we were given the opportunity to review French Essentials through The Old Schoolhouse Review Crew. We were given one year to the Full Access Online Program on the website.

 photo frenchessentialsscreenshot_zps981045a1.jpg
Online Portal

French Essentials began as an effort of two native French homeschool parents, Greg and Irene Shone, who put together French tutoring lessons at the request of their friends. It developed into a DVD program. In order to grow and be more affordable for more families, they decided to build an online portal where families could purchase the lessons in modules, and access all parts of the lessons in one central location.

There are 6 modules currently available, with another 4 modules being developed and coming soon. Students can move at their own pace through the modules. If a student already has some French knowledge, they can start off with the online placement test to see which module they should begin with. If they have no previous French instruction, then it is suggested to start with Module 1.

What is the recommended age for this curriculum? Students need at least a 3rd grade reading level to be able to work in this program. Modules 1-5 are equivalent for use in grades 4-8. Modules 5 and 6 are suggested for junior high level. High school level (grades 10-12) can use modules 7-10 (with previous use of this program, or prior French instruction).

What is this program like? French Essentials really is a total immersion French program. Once you purchase access to the online program, you will be able to download your written lessons for your entire module. The lessons contain built-in audio links, so that everything you need for the lesson is right on your desktop. The lesson will instruct you to 'click a link to hear the correct pronunciation, and then repeat it', or give directions to practice with your teacher. The audio links can be repeated as often as desired in order to practice the new words or phrases.

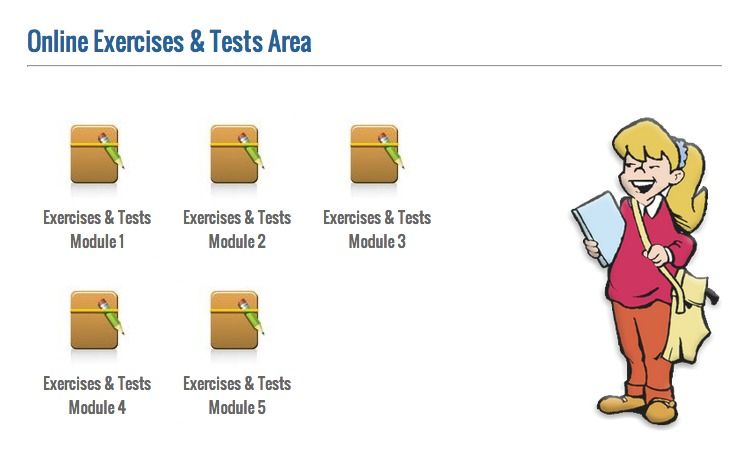
Not only does French Essentials have written lessons that contain audio links, but once you are on the website, you can go to the interactive section that corresponds with your module, and have further review. There are a number of varied review opportunities, such as flash cards to review new vocabulary, games, and tests. The flash cards and games have numerous options, such as choosing English to French, or French to English. You also have the option of choosing to listen to the words/phrases being said, or reading them.

Testing: The online tests have several options - fill in the blanks, multiple choice, or matching. The parent can choose the level of difficulty depending on the student's age and abilities. Older students would be required to know actual correct spelling, and not just 'how to say' the words, for example. Younger students, on the other hand, might be required to be able to just recognize the correct matches, but not have to know how to write them out. The tests are graded immediately by the computer, to make it easier for parents.

Does a parent need to know French for their child to use this program? No! The parent may want to learn alongside the child, but everything the child needs to work through this program is included for them, right at their level. Each module contains a handy parent checklist that allows the parent to keep careful records of what the student has accomplished, and to keep track of their test scores. It really helps the parent to know that all the material has been covered.

Parent's checklist

What about written work? Each lesson contains downloadable worksheets for plenty of review! I was amazed at how much book work was included in addition to the actual lesson. The worksheets vary in intensity, with a good mixture of fun breaking up the tedious review exercises. And never fear....there is a teacher key available on the website for the parent to download. Again, a working knowledge of French is not a necessity for the parent!

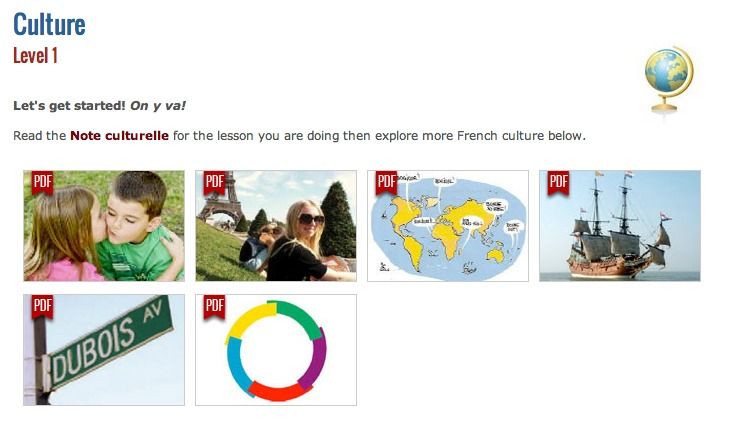
A really neat feature: Melissa really enjoyed the French culture videos that accompany the lessons. Level One includes six short videos describing various aspects of French culture. We were surprised to learn how many countries have French as one of their official languages! It was about three times more than what I expected!


Total immersion: French Essentials seeks to meet the needs of all types of learners. The work is presented with diversity to satisfy all the learning styles. There is written work, audio, video, and plenty of review options. The only thing missing is having an actual French person sitting in the room with you, giving you instant feedback.

How we used this program: My 7th grader, Melissa, is the student using this program. After signing up and gaining access to the website, I easily downloaded the first few lessons of module one, and we began to work on it. Module one contains twenty lessons, and my plan was to get through the first 'introduction' lessons quickly, moving Melissa on to the meatier portion of the module. I found out that she was not ready to move as quickly as I thought and was getting very frustrated, so we slowed it down, and have completed one lesson a week, spending about four days on each lesson. This has been a much more enjoyable pace for her.

Module one lessons are about 70 pages long total, and start the student off with learning the French alphabet, as well as simple greeting and friendly phrases. Overall, they will learn about 160 new vocabulary words and phrases. Because of the varied review methods, the students really do learn this vocabulary inside out. Each lesson has a set of printable worksheets, and I also printed those out and put them in a binder for Melissa.


We typically would spend two days on the actual lesson itself, reading it over, and listening to the audio prompts in the lesson. Melissa would practice and repeat as instructed. The corresponding worksheets for the lesson would take us one to two days to complete, and then Melissa would spend one day on the website doing extra review games and practice for that lesson. This is also when she would explore the culture videos or take the online test. I haven't used the tests a whole lot yet, since she is just beginning, but I know they will come in handy as she progresses into more difficult material. Each day had an overlap of various activities...we would start the lesson first, but then move on to worksheets and complete one or two pages each day, until they were finished.

My opinion:  Prior to beginning this program, Melissa knew about ten French words. She desperately wanted to learn French, though, so we set off on our journey. I have to say that this program was much more work than I was expecting! When I first learned that module one was considered appropriate for third grade and up, I think mentally I was prepared for much easier lessons. The program is definitely more intense than I anticipated. This actually turned out to be a positive factor though, because although we have had to go much slower than I planned, Melissa is learning a lot more than I thought she would! I view this program much more as a junior high/senior high school level course, and not as an elementary course, although younger students definitely could get something out of it. When using all aspects of the course as instructed, be prepared for an intense study of the French language, and a thorough workout of all your linguistic tendencies!

For the future: Melissa is enjoying learning French, and seems to have a natural knack for repeating words with the accents of the speakers in the video clips. I am excited to have her learning the language that she had such a longing for. She will continue with module one, and I hope to have her complete module two this year as well. Since we were given a one year membership for this review, I will have Melissa use that time to go as far as she is able in her French journey. I would definitely be interested in purchasing more modules in the future so that Melissa could further her studies. I think the layout of this program is more than adequate to give a thorough French education to my aspiring Francophone!

Computer requirements: Since this program is accessed through an online portal, the user should have a good working knowledge of downloading so that they are able to acquire their lessons. The program is available for both Mac and PC users, and utilizes Adobe Reader and Quicktime. There is a good deal of technical help on the website in case you run into problems with any aspect of the program.

So what does it cost? There are two ways to purchase this program. Modules can be purchased separately, one at a time, allowing 90 days of complete access to all components of the program, for $69.95. Or you can purchase full access to the entire set of modules currently available for a whole year for $149.95.

See how other Crew members are using French Essentials in their home by clicking the banner below:

Photobucket
  
Copyright 2012-2013 - "Be The One" - www.aclassofone.blogspot.com  All rights are reserved. No text, photos, or content may be reproduced without direct permission from the author.

 photo Disclaimer2_zpsff718028.gif