Thursday, December 19, 2013

Christmas Pretzels {with an Allergy Free Alternative}

Every year our family does a ton of baking. We give most of it away as Christmas gifts. It's a lot of fun, and the girls look forward to our "baking day".

This year I found a really cute recipe for these pretzel snacks, and thought they would make a cute addition to our cookie trays. A bonus is that I figured an easy way to make them allergy friendly.

I got the original idea from this blog post and then made my allergy friendly adjustments, as noted below.

Here's step-by-step directions for making these:


First step is to gather supplies:
  • Ring pretzels
  • Hershey's candy cane kisses
  • Nestle red & green morsels

Cover a large baking sheet with wax paper or parchment paper, then spread the ring pretzels out over it so they are flat and not overlapping.

After unwrapping all the kisses, place one kiss inside each pretzel ring. Some of them might seem like they won't fit, and that's ok. They will melt and easily fill the area inside the ring.


Pre-heat your oven to 200 degrees. Place the baking sheet of pretzels and kisses in the oven for 4 minutes. After removing them from the oven, immediately place one small Nestle morsel into the center of each melted kiss. I used the smallest amount of pressure to push down and make sure the melted kiss filled the area inside the pretzel ring, taking care to not 'smudge' the red and white lines.

Place in a cold spot, to let them harden and chill. Enjoy!


They have a crunchy texture and a minty taste and look fabulous as fillers on a cookie tray. And the best part? This is a very kid-friendly project!

Now....for the allergy-free version......

I gathered the following supplies:

  • Ener-G gluten free, dairy free pretzel rings
  • Enjoy Life mini chocolate chips (gluten/dairy free)
  • crushed peppermints (you can take safe candy canes and throw them into a food processor - they will make a nice bowl full of crushed peppermint pieces)
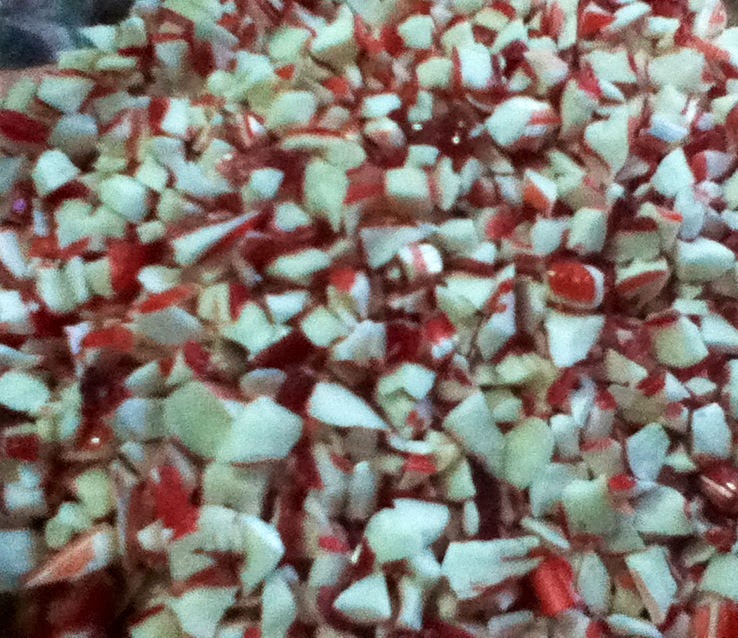
Follow the same procedure as above - cover a baking sheet with wax or parchment paper, lay out the pretzel rings on the sheet, and fill each ring with as many mini chips as will fit without overflowing.
Feel free to pile them up, because they will flatten out when they melt.


Preheat your oven to 400 degrees and place the sheet into the oven for 4 minutes. When you pull the sheet out, immediately take a small spoon and spread the melted chocolate inside the pretzel ring area.


Quickly, before the chocolate hardens, sprinkle the crushed peppermint pieces into the  middle of each pool of melted chocolate.


These are crunchy, minty safe snacks for kiddos with allergies who can't enjoy all the regular Christmas baking.  The snacks are free of dairy and gluten and nuts!  And they are super easy and quick to make!

I am linking this recipe up with Lisa at Try A New Recipe Tuesday and Karen at Kids and A Mom In the Kitchen

Photobucket

This is also linked to Cooking With Kids at The Old Schoolhouse.

Cooking with Kids


Copyright 2012-2013 - "Be The One" - www.aclassofone.blogspot.com  All rights are reserved. No text, photos, or content may be reproduced without direct permission from the author.

Friday, December 13, 2013

Apologia Anatomy & Physiology Unit Three: Build A Model Robotic Hand


As we continue our journey through Apologia Anatomy & Physiology, I have found lots of cool projects to keep us busy and to reinforce the lessons we are learning.


STEM Resources for Homeschool


From my review of Supercharged Science in Spring of 2013, I remembered seeing a lesson with this project, and thought it would align perfectly with the unit that was studying all the muscles and tendons.

From this project, we learned that hands function because of the way the tendons are aligned. We found the tendon in our wrist that, when pressed, causes the fingers to twitch and curl. It is pretty amazing to study the handiwork of God and realize all that a hand is capable of performing.

We went to the Supercharged Science website and watched the lesson on how to build the robotic hand:


Then we gathered our supplies:

Supplies include:
  • cardboard
  • scissors
  • utility knife
  • bendable straws
  • string or yarn
  • thick rubber bands
  • hot glue gun and glue sticks
  • pencil
We traced an adult sized hand on cardboard and carefully cut it out:


We glued the bendable straws on each finger, so that the bendy part was on the hand and the long part of the straw was on the fingers. We trimmed the edges of the straw to align with the edge of the fingers.


We took our pencil and marked on the fingers of the cardboard hand the location of the joints and knuckles from the real-life hand.  Then we took the utility knife and carefully scored the back side of the hand on those lines, so that the fingers would curl and bend properly.


Using our pencil marks as a guide, we carefully sliced a section of the straw off (at 45 degree angles) where the joints are located. This helps the 'fingers' to bend properly as well.


When we are done with all the joint cuts, it looks like this:


We took string and ran it through each straw, leaving a long tail out both the top and bottom of the straw. We cut the rubber bands so that they would be a long strip instead of a circle. At the top of each finger, we tied the string and rubber band ends together in a small knot.


Turning the hand over, and with fingers straightened out and laid flat, we hot glued the loose ends of the rubber band down to the back of the hand. The glue should only be right at the end of the rubber band. The rest of it needs to stay loose so that it can freely move and guide the fingers. The rubber bands help the fingers to return to their natural state after being curled up. 


Once the hand was completed, we had lots of opportunity to 'play' with it and see how the tendons in a hand function, by pulling downward on the strings.


One of the favorite things to do with the hand was to make sign language letters and spell out words and phrases....or to say "I love you"!


This was a great project and we were very happy with the outcome. Everyone who has seen it is fascinated by it, and it clearly demonstrates the movements of a hand. I highly recommend this project!


Copyright 2012-2013 - "Be The One" - www.aclassofone.blogspot.com  All rights are reserved. No text, photos, or content may be reproduced without direct permission from the author.

This post is linked with Apologia's Homeschool Science Share & Tell

Monday, December 9, 2013

Building a Salt Dough Map of the Oregon Trail

As part of our study on the American Westward Expansion of the 19th century, we have read several books and materials about the Oregon Trail.

In order to illustrate just how huge of an undertaking it was to set out for the West on wagon trains, and to cross over the Rocky Mountains in the process, we decided to construct a Salt Dough Map of the United States, illustrating the location of the Oregon Trail and showing how it crossed over the mountains.

Melissa was amazed at just how far a trip it was, once she figured out the scale of her model in miles! No wonder it took months to get to the West Coast!


Here is a picture of the finished project:


And here is a close up of her mountain ranges, with the tan line illustrating the Oregon Trail crossing right through the mountain pass.


While our Oregon Trail was a little 'south' of it's proper location, it still was able to drive home two very important facts: 1) It was a long trip that covered a large portion of the United States, and 2) Crossing the western mountain ranges was no small feat!


Would you like to make a salt dough map? It's very easy!

First, obtain a piece of flat cardboard, and sketch your outline onto it. For our map, we traced an outline of the US from a map in a book, then cut it out, making a template and tracing it onto the cardboard.

Next we mixed up the dough using the following recipe:

2 cups salt
1 cup white flour
about half cup of water

We thoroughly mixed the salt and flour, and gradually added the water a few drops at a time until the dough was moist and flexible, but not watery.  We started out with a half cup of water, but did not even end up using all of it.

We left ours white, then painted it once it was spread out and dried, but another option is to separate the dough into as many colors as you will be using for your project, then mix food coloring in to each dough portion to make 'colored' salt dough.

Once you have your dough prepared, spread it out onto the cardboard outline, taking care to keep the dough from spreading outside the lines. While it is still moist, create the geographical landforms of your map. For our project, Melissa first pinched the dough into mountains both out west and also in the East, to represent the Appalachian Mountains. She also made craters for major lakes, and took the back of a spoon to make straight lines for major rivers, and for the Oregon Trail itself. Although it didn't show up well, she made an X to mark the spot for the start of the Trail in Independence, Missouri.

The salt dough takes about a full 24 hours to dry. Once it is dry, it can then be painted if desired. Melissa painted our mountains brown, prairies green, rivers and lakes blue, and finally she painted the Oregon Trail tan so it would stand out. As an artistic final touch, she flecked some purple hues onto the highest mountains to show "Purple Mountain Majesties".

The project looks really neat when completed. It's a great project because it is a wonderful, hands-on learning tool that doesn't take long to make, and doesn't leave much mess to clean up. This salt dough recipe is really not messy at all! And when it is complete, you can pretend that you are looking at the US from outer space. (That brought a whole different angle to this lesson!)


Copyright 2012-2013 - "Be The One" - www.aclassofone.blogspot.com  All rights are reserved. No text, photos, or content may be reproduced without direct permission from the author.